1950 Ford of Australia Prefect Ute
Model: A493A-67 Body Number 1552
Restoration (Updated 2/11/2005)

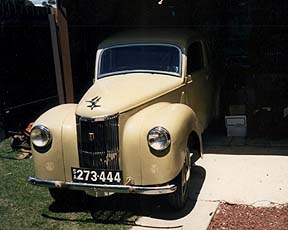
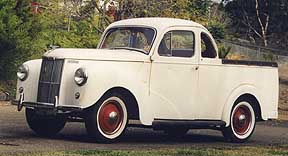
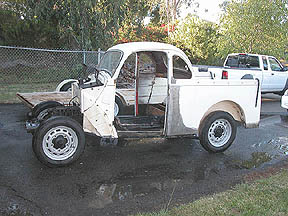
This is what I know about this particular 1950 Ford Prefect Ute.... It was originally sold in the summer of 1950, at Fischers Motors, Nhill, Victoria, Australia. The original owners was the Batty family, who lived in Boardertown, South Australia. On August 10, 1950, they back-ordered the tool kit for this Ute, and was picked up (see ancient invoice). In 1978, the husband apparently passed away, and his wife Evelyn, re-registered it in her name.

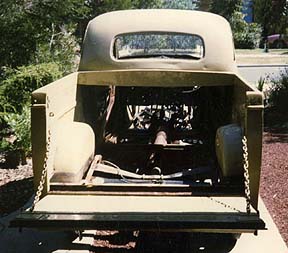
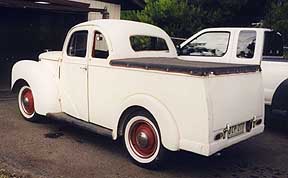
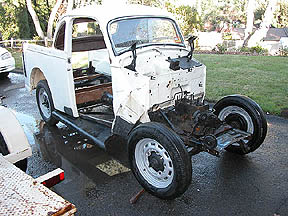
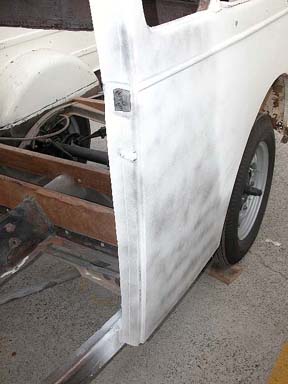
In 1984, the Ute was sold to Terry Brooks of Melton, Victoria, who began a restoration job. By 1987, he had lost interest in the project and sold it once again to Pauline Filbey (Woodvale, Victoria) and Kevin Gilbert (who later married). Kevin did a quick restoration job between '87 and '94, and eventually took it to the Bendigo Swap Meet in November, 1994, where I saw the Ute, and purchased it.

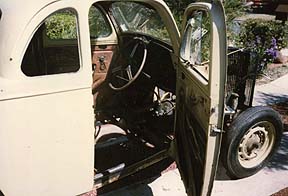
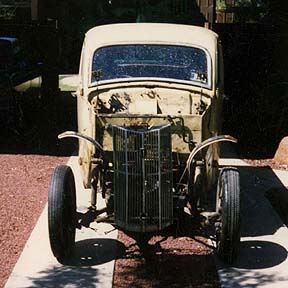
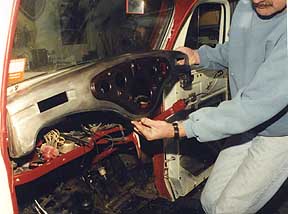
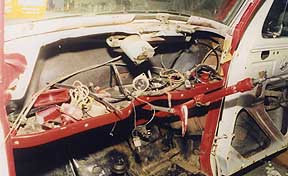
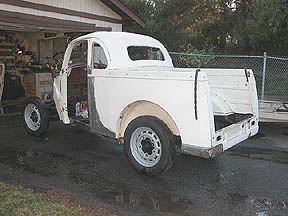
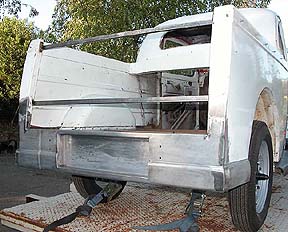
From November 1994, until October 2003, this truck was stored at Peter Jackson's shop, waiting for a decent deal on shipping. Finally, thanks to Peter, the car was shipped to California. And things began to happen during December 2003.....


These four photos were taken back in the late eighties, during the Ute's first restoration process (in Australia). You can tell from these pics that the original color was a beige, and from what I can see, the original interior was done in green..... Apparently, the passenger's side door was replaced at some time. A NOS door was located at Eclipse Motors, Adelaide, South Australia (dealership painted address is still found on the inside of that door!).
 

ABOVE, this is what I am starting with. White-wall tires and 15-inch VW rims have got to go!

ABOVE, next to this new Nissan Extra Cab, this '50 Ute looks a little out of place in modern times.
 
Believe it or not, the main dash panel on a Ute is metal...not Bakelite! The center panel is Bakelite.
 
With the dash removed, the wiring is exposed. Cloth-bound wiring will be replaced. 6V wiper motor?
 
Factory boxed and braced chassis... and you thought drag racers from the '60s invented this.


Rear bulkhead is removable. Parcel tray is shown, as is the two spare tire strap brackets.


Interior door, window and grab handles are unique. Plastic-coated handles are gear-mounted.
 
The engine is a 10hp/1172cc model, with a std. bore, wornout guides and in need of a valve job.
 
LEFT, although the rear fender on a Prefect Ute looks like an Anglia/Prefect sedan fender, it's not. Notice how the shape is more squared-off. Mounting is totally different as well.
 
LEFT, yes, the Australian-built Utes have vent wings! And no window frames as well. Door assembly is totally different than an English-built door.

 ABOVE, new rear bulkhead liner was made, using photographs from other Utes (mine was long done). I used hardboard, and cut-out the two spare tire strap tie down slots. It was then covered with gray vinyl (no pad), which will be used on the door panels and elsewhere in the interior. Existing red vinyl will be dyed to match.

 What secures the wood floors to the chassis is a series of 1/4x20 weld-nuts. I found these at a restoration supply house. These were MIG-welded into place, along with making new hardwood floor panels.

 It has been decided to so a full ground-up resto on my Ute. So, the entire Ute is in the process of being disassembled. Around behind the passenger side door needs work by a professional. This are was involved in some type of accident and the door jamb has never lined up properly.

 With the front nose removed you can still see the engine and trans in place. I am going to leave them intact, during the door alignment process... just in case. You can see the new tires and wheels here. Tires are correct, tube-type, 5.25-50x16-inch Firestones from Coker Tire. Wheels are silver powdercoated, beadblasted 16-inchers.

 From this angle you can see the bed and rear quarterpanel with rear fender removed. Left rear corner was hit hard at one time.... needs work.

 Once all the plastic filler was removed, the real damage was uncovered. Wow, what a mess. And this photo was taken after we spent a few hours on pulling the corner out, and removing all the lead and bondo that was present.

 Since the existing rear panel was beat to death, we decided to have a new one made from scratch. For this, we went to Gab-Fab, in Anaheim, CA, and had Danny Gabber make and fit a new one to the Ute. New Panel is 20 guage, and fits the body like it was OEM. Two upper cross bars are to keep the bed aligned, during the building process (and with the wood removed out of the back).

 The new rear panel is slightly different from the OEM, in that the original Australian license plate opening was too narrow (top to bottom), to fit a proper California plate in. So, it was enlarged by 1-inch (towards the bottom), and now, a year of manufacture plate (YOM), can now be fitted (1950 large black plate with frame). There will be no extra taillights fitted, since these Utes only came with one, combo license plate/brake light, fitted inside the license plate opening. Two holes found on both sides of this box are for the tail gate hinge mounts.


We finally got Danny Gabber to address our problem with the passenger side door and rear quarter panel problem. This panel has never align correctly, the door sagged, and gaps were all over the place. So, the hinges were heated and tweaked, new pins were fitted, the A-pillar was pushed back up, the B-post was pushed out 3/4-inch(!), and the old door jamb was cut out.


Once the old door jam section (about a 10-inch wide piece the full height of the panel), the gaps were redone, a new door jamb section was made, and refitted, then TIG-welded to the existing panel. The result was a straight, proper contouring panel that meets the door correctly, and even the bottom edge now now is straight.


 From this angle you can see the body contour now matches the door skin shape. Notice how the body line now matches. Before, this line sagged about 1/2-inch down, as it met the door skin line. At this point, there isn't any dove tails, or striker plates fitted, So, the door is hanging correctly, without any further alignment. Amazing. Hinges were rebushed, heated and tweaked.


 With the door opened, you can see the new door jamb section that Danny made from scratch. There is actually a B-post behind this skin, which was pushed in about 3/4-inch! So, the old jamb metal was too beat up to reuse. A new metal section was TIG-welded in place, and at the same time, the rear door gap was set. There was no plastic filler used in this repair!